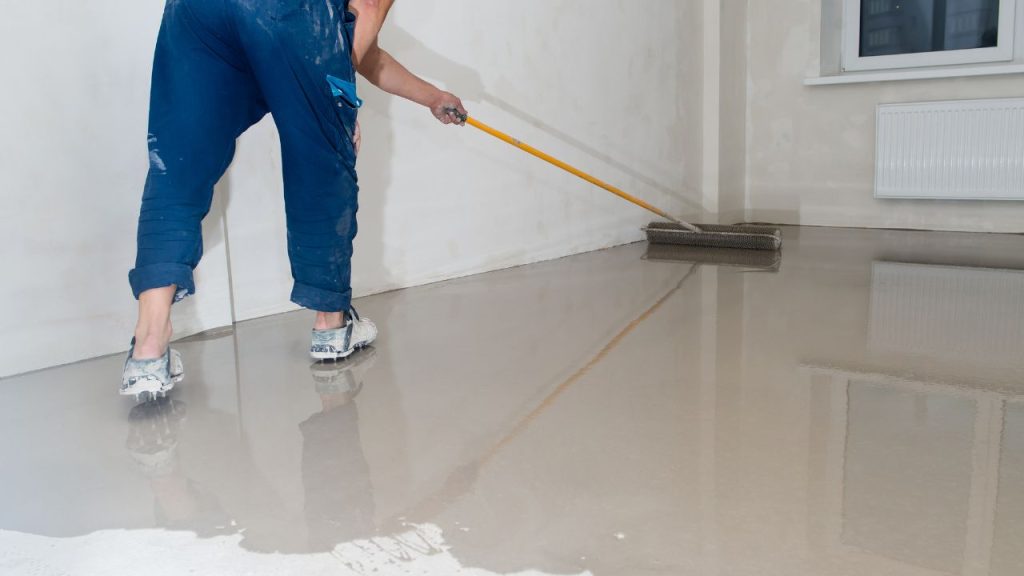
Screed acts as a smooth and level layer on which flooring materials, such as tiles, wood, or laminate, can be installed. It helps to create an even surface, rectify irregularities, and enhance the durability of the floor. There are different types of screed available, including traditional sand and cement screed, self-leveling screed, and liquid screed. Each type has specific characteristics and drying requirements.
Factors Affecting Drying Time
Several factors influence the drying time of screed. It is essential to consider these factors to determine the appropriate drying techniques. The key factors affecting the drying time include:
Thickness of Screed Layer
The thickness of the screed layer is a crucial factor in determining the drying time. Thicker layers take longer to dry compared to thinner ones. It is important to follow the manufacturer’s guidelines regarding the recommended thickness for the specific type of screed being used.
Ambient Conditions
The surrounding environment significantly impacts the drying process. Factors such as temperature, humidity, and airflow affect the rate at which screed dries. Ideally, the ambient temperature should be between 20°C and 25°C, with a relative humidity level of around 50%. Proper ventilation helps to promote evaporation and speed up drying.
Type of Screed
Different types of screed have varying drying characteristics. Traditional sand and cement screed typically require more time to dry, while self-leveling and liquid screeds offer faster drying times. Understanding the properties of the chosen screed type is crucial for efficient drying.
There are several types of screed commonly used in construction:
- Traditional sand and cement screed
- Pumped screed
- Liquid screed
- Fast-drying screed
Preparation for Efficient Drying
Before attempting to dry screed quickly, it is essential to ensure proper preparation. The following steps can contribute to faster drying times:
- Surface Cleaning and Priming
Thoroughly clean the surface to remove any dirt, debris, or contaminants that could hinder the drying process. Additionally, apply a suitable primer to enhance adhesion and promote even drying. - Moisture Barrier Installation
Installing a moisture barrier beneath the screed layer can prevent moisture from rising through the substrate and affecting the drying process. This is particularly important when dealing with high moisture areas or when a faster drying time is desired. - Use of Drying Additives
Consider incorporating drying additives into the screed mixture. These additives are designed to accelerate the drying process, reducing the overall drying time. Consult with the manufacturer to determine the appropriate additive and dosage for your specific project.
Accelerating the Drying Process
To expedite the drying process of screed, the following techniques can be employed:
- Utilize Heating Systems
Using heating systems, such as underfloor heating or radiant heaters, can significantly speed up the drying time. Heat promotes evaporation and helps to extract moisture from the screed. Ensure proper temperature control to prevent any damage to the screed or other surrounding materials. - Increase Air Circulation
Improving air circulation within the drying area is crucial for efficient drying. Open windows, use fans, or dehumidifiers to facilitate the movement of air. This helps to remove excess moisture and enhances evaporation. - Dehumidification
In areas with high humidity levels, employing dehumidifiers can aid in moisture removal and expedite drying. Dehumidifiers extract moisture from the air, reducing the overall humidity and promoting faster drying.
Best Practices for Quick Drying
In addition to the techniques mentioned above, following these best practices can further enhance the efficiency of the drying process:
1. Proper Ventilation
Ensuring good air circulation is one of the most effective ways to speed up screed drying. Here are some tips:
- Open windows and doors to create cross-ventilation
- Use fans to promote air movement
- Consider using dehumidifiers to remove excess moisture from the air
2. Temperature Control
Maintaining an optimal temperature can significantly reduce drying times:
- Aim for a consistent temperature between 15°C and 20°C
- Avoid extreme temperature fluctuations
- Use underfloor heating systems, if available, to provide gentle, consistent heat
3. Dehumidification
Reducing ambient humidity can accelerate the evaporation of moisture from the screed:
- Use industrial dehumidifiers to extract moisture from the air
- Aim for a relative humidity of 50-60%
- Monitor humidity levels regularly using a hygrometer
4. Force Drying
For projects with tight deadlines, force drying techniques can be employed:
- Use specialized screed drying equipment
- Implement controlled heating and dehumidification systems
- Be cautious not to dry too quickly, as this can lead to cracking
5. Choosing Fast-Drying Screed Products
Opting for specially formulated fast-drying screed products can significantly reduce waiting times:
- Look for products with additives that promote rapid drying
- Consider using anhydrite (calcium sulphate) screeds, which typically dry faster than cement-based alternatives
Comparison of Drying Times for Different Screed Types
To help you make an informed decision, here’s a comparison of typical drying times for various screed types:
| Screed Type | Thickness | Drying Time (Approx.) |
|---|---|---|
| Traditional sand and cement | 50mm | 50-60 days |
| Pumped screed | 50mm | 40-50 days |
| Liquid screed | 50mm | 20-30 days |
| Fast-drying screed | 50mm | 10-14 days |
Please note that these are approximate times and can vary based on environmental conditions and specific product formulations.
Monitoring and Testing
Monitoring and testing the drying progress of screed is essential to ensure it is ready for further construction work. Several methods can be employed to assess the moisture content and confirm the readiness of the screed. Here are some methods:
1. Carbide Method (CM Test)
This is a widely accepted method for determining screed moisture content:
- A sample of screed is crushed and mixed with calcium carbide in a pressure vessel
- The resulting pressure indicates the moisture content
- Typically, a reading of less than 0.5% is considered dry enough for most floor coverings
2. Digital Moisture Meters
Non-destructive and quick, these devices provide instant readings:
- Choose meters specifically calibrated for screed
- Take multiple readings across the floor for accuracy
- Be aware that surface readings may not reflect moisture levels deeper in the screed
3. Hygrometer Test
This method measures the relative humidity above the screed surface:
- A digital or analogue hygrometer is placed under an insulated box on the screed surface
- Readings are taken after a set period (usually 72 hours)
- A relative humidity of 75% or less is generally considered acceptable for most floor coverings
Common Mistakes to Avoid
- Rushing the drying process excessively, which can lead to cracking and reduced strength
- Neglecting to protect the screed from adverse weather conditions
- Failing to properly prepare the subfloor before screed application
- Using incorrect mixing ratios or adding too much water to the screed mix
- Laying floor coverings before the screed has adequately dried
Case Study: Accelerated Screed Drying in a Commercial Project
To illustrate the effectiveness of rapid drying techniques, let’s consider a recent commercial project in London:
A large office building renovation required 1000m² of new flooring to be installed within a tight timeframe. The project team opted for a liquid calcium sulphate screed with a thickness of 50mm. By implementing a combination of controlled heating, dehumidification, and proper ventilation, they were able to reduce the drying time from the typical 20-30 days to just 15 days.
Key strategies employed:
- Maintained a constant temperature of 18°C using portable heaters
- Deployed industrial dehumidifiers to keep relative humidity below 60%
- Installed temporary ventilation systems to ensure continuous air circulation
- Used moisture meters to regularly monitor drying progress
The result was a successfully dried screed that allowed for the timely installation of the final flooring, keeping the project on schedule and within budget.
Future Trends in Screed Technology
As the construction industry continues to evolve, new innovations in screed technology are emerging:
- Self-drying screeds: These advanced formulations incorporate chemical additives that accelerate the drying process from within.
- Eco-friendly options: Manufacturers are developing more sustainable screed products using recycled materials and low-carbon cement alternatives.
- Smart moisture monitoring: IoT-enabled sensors embedded in screed layers could provide real-time data on moisture levels and drying progress.
- Nanotechnology: The incorporation of nanoparticles in screed mixtures may lead to improved strength and faster drying times.
- 3D printed screeds: As 3D printing technology advances in construction, we may see more precise and efficient screed application methods.
Conclusion
Efficiently drying screed is vital for the successful completion of flooring projects. By understanding the factors affecting drying time, properly preparing the surface, employing suitable techniques, and following best practices, you can significantly reduce the drying time of screed. Remember to monitor and test the screed’s moisture content before proceeding with subsequent construction activities.
Frequently Asked Questions
Can I apply screed on a damp surface?
It is not advisable to apply screed on a damp surface as it can affect the drying process and compromise the integrity of the flooring.
How long does it take for screed to dry completely?
The drying time of screed varies depending on several factors such as the type of screed, thickness, ambient conditions, and drying techniques employed. It can range from a few days to several weeks.
Can I walk on screed before it is fully dried?
It is best to avoid walking on screed until it has fully dried to prevent any damage or deformities to the surface.
Can I speed up the drying process by increasing the ambient temperature?
While increasing the temperature can accelerate the drying process, it is crucial to maintain a controlled temperature range to avoid any adverse effects on the screed and surrounding materials.
What should I do if the screed takes longer to dry than expected?
If the screed takes longer to dry than expected, it is advisable to consult with a professional or the screed manufacturer to identify any potential issues and determine the best course of action.
How do I know when screed is dry enough for floor covering?
The most reliable way is to use moisture testing methods such as the carbide method or hygrometer test. Generally, a moisture content of less than 0.5% or a relative humidity of 75% or less is considered suitable for most floor coverings.
Is it possible to over-dry screed?
Yes, drying screed too quickly or aggressively can lead to cracking and reduced strength. It’s important to follow recommended drying procedures and avoid excessive heat or rapid moisture removal.