
Anhydrite screed, also called calcium sulphate screed, is a pumpable, self levelling floor screed that suits underfloor heating well because it flows around pipes and conducts heat efficiently. Its two non negotiable rules are moisture and laitance: the screed must be dry enough, tested properly, before it is covered, and the weak laitance skin on its surface must be removed before any covering or adhesive goes down. Get those two steps right and anhydrite is fast and flat. Skip either one and the floor covering is likely to fail.
This unique type of screed offers numerous advantages, such as enhanced thermal conductivity and reduced drying time. However, like any construction material, anhydrite floor screed has its own set of considerations and challenges. In this comprehensive guide, we will explore everything you need to know about anhydrite floor screed, from its installation process to common problems and maintenance tips.
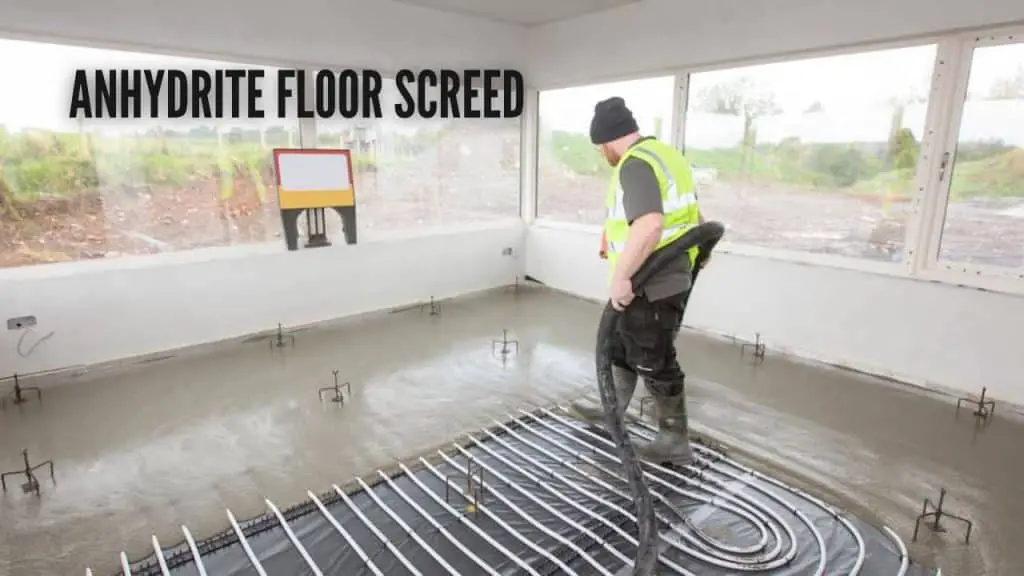
What is Anhydrite Screed?
Anhydrite screed, also known as calcium sulfate screed, is a self-leveling floor screed that consists of anhydrous calcium sulfate binder, aggregates, and water. It offers a smooth, level surface that is ideal for a variety of floor finishes, including tiles, carpets, and vinyl. Anhydrite screed is often chosen for its excellent thermal conductivity and compatibility with underfloor heating systems.
Anhydrite Floor Screed Problems
While anhydrite floor screed offers several benefits, it can also present certain challenges. It’s essential to be aware of potential problems to ensure a successful installation. Here are some common issues associated with anhydrite floor screed:
Incompatibility with Some Floor Finishes
Certain floor finishes, such as moisture-sensitive materials like wood, may not be compatible with anhydrite screed due to its residual moisture content. It’s crucial to consult with flooring manufacturers and experts to determine the suitability of anhydrite screed for specific floor finishes.
High Sensitivity to Moisture
Anhydrite screed is highly sensitive to moisture, and excessive water exposure can lead to swelling, cracking, or deformation. Proper moisture testing and moisture control measures must be implemented during the installation process.
Limited Load-Bearing Capacity
Compared to traditional cement screed, anhydrite screed has a lower load-bearing capacity. It may not be suitable for areas subjected to heavy loads or intense foot traffic. Structural engineers and construction professionals should evaluate the load requirements before choosing anhydrite screed.
Anhydrite Screed Cracking
One of the most common concerns associated with anhydrite screed is cracking. Cracks can occur due to various factors, including shrinkage, inadequate curing, excessive drying, or structural movement. Here are a few key points to understand about anhydrite screed cracking:
Shrinkage cracks:
Anhydrite screed can shrink during the drying process, resulting in shrinkage cracks. Proper control of the drying conditions and the use of reinforcement fibers can help minimize shrinkage cracks.
Inadequate curing:
Insufficient curing time or improper curing methods can lead to weakened screed, making it more prone to cracking. Adequate curing with the use of curing compounds or wet coverings is crucial for crack prevention.
Excessive drying:
Rapid drying of anhydrite screed can cause cracks to develop. Controlling the ambient conditions, such as temperature and humidity, is essential to ensure gradual and uniform drying.
Sanding Anhydrite Screed
Sanding anhydrite screed is a common practice to achieve a smooth and level surface before the application of floor finishes. However, there are some considerations to keep in mind:
Timing:
It’s important to allow the anhydrite screed to dry adequately before sanding. Premature sanding can damage the surface and affect the overall quality of the finished floor.
Equipment:
Use appropriate sanding equipment, such as rotary sanders or sanding machines with vacuum attachments, to minimize dust and achieve the desired results efficiently.
Dust control:
Dust generated during the sanding process can be hazardous. Ensure proper ventilation, wear personal protective equipment, and use dust extraction systems to maintain a clean and safe working environment.
Anhydrite Screed Pros and Cons
Before opting for anhydrite screed, it’s crucial to weigh its pros and cons to make an informed decision. Let’s explore the advantages and disadvantages of using anhydrite floor screed:
| Pros | Cons |
|---|---|
| Enhanced thermal conductivity | Sensitivity to moisture |
| Faster drying time | Limited load-bearing capacity |
| Self-leveling properties | Incompatibility with certain floor finishes |
| Reduced material usage |
Anhydrite Screed Thickness
The thickness of anhydrite screed can vary depending on the specific project requirements and load-bearing considerations. However, the recommended thickness for most applications ranges between 30mm and 50mm. Thinner screeds may be suitable for areas with light loads, while thicker screeds are necessary for heavy-duty applications.
Anhydrite Screed vs Cement Screed
Anhydrite screed and cement screed are two popular choices for flooring applications. Let’s compare the key differences between these two types of screeds:
Material composition:
Anhydrite screed consists of anhydrous calcium sulfate binder, while cement screed uses cement as the binder.
Drying time:
Anhydrite screed generally dries faster than cement screed, allowing for quicker installation of floor finishes.
Thermal conductivity:
Anhydrite screed offers better thermal conductivity, making it an ideal option for underfloor heating systems.
Load-bearing capacity:
Cement screed has a higher load-bearing capacity compared to anhydrite screed, making it suitable for areas with heavy loads.
Try our sand and cement screed calculator to know how much screed and sand ratio required for your project.
Hairline Crack in Anhydrite Screed
Hairline cracks can occasionally occur in anhydrite screed. While hairline cracks may not affect the structural integrity of the screed, they can be aestheticallydispleasing. Here are a few points to consider regarding hairline cracks in anhydrite screed:
Hairline Crack in Anhydrite Screed Causes:
Hairline cracks can result from shrinkage during the drying process, minor structural movements, or the use of inadequate reinforcement.
Hairline Crack in Anhydrite Screed Prevention:
Proper moisture control and gradual drying can minimize the occurrence of hairline cracks. Additionally, using fiber reinforcement or crack control joints can help distribute any potential cracks.
Hairline Crack in Anhydrite Screed Repair:
If hairline cracks do appear, they can be repaired using appropriate crack repair products. Consult with a professional to determine the best course of action for repairing hairline cracks in anhydrite screed.
Anhydrite Screed and Water Exposure
Water exposure can significantly impact the performance of anhydrite screed. Here’s what you need to know:
Water sensitivity:
Anhydrite screed is highly sensitive to water, and prolonged exposure can lead to swelling, softening, and deformation. Avoid excessive water contact during and after the installation process.
Waterproofing measures:
Implement proper waterproofing measures in areas prone to water exposure, such as bathrooms or kitchens. Use appropriate waterproofing membranes and ensure proper sealing around fixtures and joints.
Regular maintenance:
Perform regular maintenance checks to identify and address any water-related issues promptly. Inspect for leaks, ensure proper drainage, and promptly repair any damages to the screed caused by water exposure.
Removing Laitance from Anhydrite Screed
Laitance refers to the weak, powdery layer that can form on the surface of anhydrite screed during the drying process. Here’s how to remove it effectively:
Mechanical removal:
Laitance can be mechanically removed by light abrasion using a suitable abrasive tool, such as a floor grinder or sander. This process helps achieve a clean, sound surface for further treatment.
Dust control:
As with any surface preparation, it’s crucial to control the dust generated during the laitance removal process. Use dust extraction systems and wear appropriate personal protective equipment.
Surface treatment:
After removing the laitance, consider applying a suitable primer or surface treatment to enhance adhesion and ensure compatibility with the chosen floor finishes.
Thickness to BS 8204-7
Calcium sulphate screed to BS 8204-7 is thinner than cement screed: 25 mm bonded to a prepared slab, 30 mm unbonded over a separating layer, and 40 mm floating over insulation (35 mm floating in domestic work), with at least 25 mm cover over underfloor heating pipes. Those are minimums at the thinnest point, so specify above them where the slab is uneven. Thinner than the minimum, the screed cracks and curls, worst at edges and around pipes, and no amount of careful curing rescues a screed laid too thin.
Drying, moisture testing and laitance
Plan drying at about 1 day per millimetre up to 40 mm, then 2 days per millimetre beyond that, at good conditions of about 20 degrees C and adequate ventilation, so a 40 mm screed plans at about 40 days before testing. That is a planning figure, not a guarantee: cold rooms and poor airflow slow it, and forced drying that is too aggressive can crack the surface. Test before covering, using the carbide (calcium carbide) method, and do not cover an impermeable finish until the reading is below 0.5 percent moisture. Resilient and moisture sensitive coverings need that test, not a guess from the calendar. Separately, remove laitance by light sanding once the screed is dry enough to sand, and vacuum the dust fully, because adhesives and primers bond to laitance, not to the screed, and a covering laid over laitance can lift with the skin.
Volume worked example
Volume equals area multiplied by thickness in metres. A room of 20 square metres laid with anhydrite screed at 40 mm needs 20 x 0.04 = 0.80 cubic metre. The same room at 50 mm needs 20 x 0.05 = 1.00 cubic metre. Measure thickness at several points and use the average, because a slab that falls away across a room quietly adds volume to the order, and pumpable screed is ordered by volume, so a short order stops the pour halfway across the floor.
Conclusion
Anhydrite floor screed is a versatile flooring solution that offers various benefits such as enhanced thermal conductivity and reduced drying time. However, it’s essential to be aware of its challenges and considerations, including moisture sensitivity, load-bearing capacity, and compatibility with certain floor finishes. By understanding the installation process, common problems, and maintenance tips, you can ensure the successful implementation of anhydrite floor screed for your projects.
FAQs:
Can anhydrite floor screed be used with underfloor heating systems?
Yes, anhydrite floor screed is an excellent choice for underfloor heating systems due to its enhanced thermal conductivity.
Is anhydrite screed more expensive than cement screed?
Anhydrite screed is generally more cost-effective than cement screed, as it requires less material for the same thickness.
Can anhydrite screed be installed in high-traffic areas?
Anhydrite screed has a lower load-bearing capacity compared to cement screed, so it may not be suitable for areas with heavy loads or intense foot traffic.
How long does anhydrite screed take to dry?
The drying time of anhydrite screed depends on various factors such as thickness, ambient conditions, and ventilation. Typically, it dries faster than traditional cement screed.
Can anhydrite screed be used with moisture-sensitive floor finishes?
Anhydrite screed may not be compatible with moisture-sensitive floor finishes such as wood. Consult with flooring manufacturers to determine the suitability of anhydrite screed for specific finishes.
What should I do if I notice hairline cracks in anhydrite screed?
Hairline cracks can be repaired using appropriate crack repair products. Consult with professionals for guidance on the best approach for repairing hairline cracks in anhydrite screed.